| ||||||||||||||||||||||||||||||||||||||||


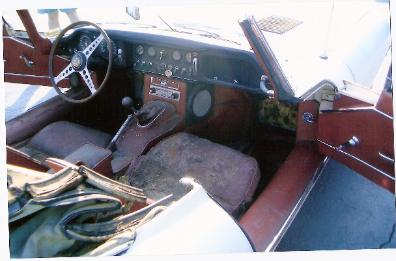

| This 1964 XKE roadster, with only 9470 original miles, was found locally by my good friend and racing buddy Chuck Leighton, who has since passed away. He knew I had been toying with buying a very high end XKE and also that I had been frustrated by the quality and mixed history of available cars. So Chuck did what any good car buddy would. He marked it up significantly and convinced me I had to have it. I returned the favor by insisting he do the paint work. That left us even, and me with a very good car. More friend to friend salesmanship took place when I caught Jeff Moore in a weak moment and convinced him to restore it for me. I plan to document the restoration here. |
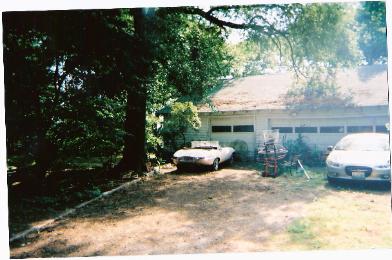
| The second owner whom we purchased the car from parked the car in this garage sometime in 1970. There it sat, home to untold generations of cats until removed in 2005. The now elderly lady explained that she had run into a few problems with the police, and her husband would no longer let her drive the Jag. |
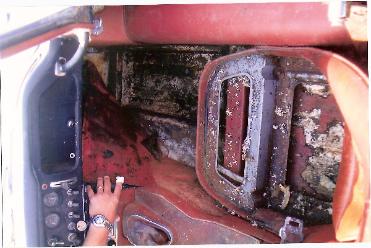
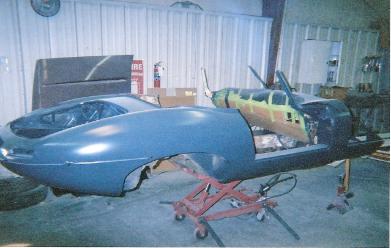
| 32 years of storage had left the car in a pretty sad state. However on close inspection I realized that not only was the car 100% rust free, it was even more original, and had never been hit or repaired. Currently totally disassembled and painted (thanks Chuck), no evidence of any previous body work or collision repair was found. Car was and is original from rockers to floors, to trunk, to trim. Car will be restored with 100% original re-chromed original trim. No chinese repro crap! |
| I got the car running prior to disassembly and the odometer worked! Still not totally convinced of the mileage despite the documentation, Jeff took the head and sump off the engine for a quick inspection. Absolutely no ring ridge or wear in the cylinders, bearings looked new, even the tensioners looked new. 9000 mile engine will be re-assembled with only paint, valve lap, and head gasket. |
| I couldn't figure out why the chassis number was written in grease pencil all over the car. I have since been told that this was part of the factory assembly process. |

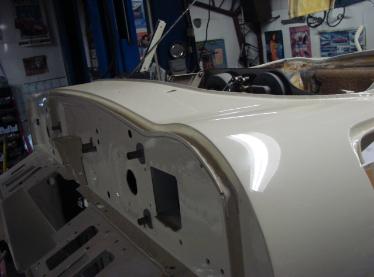
| Before the sanders started stripping the car, a portion of the original paint was color sanded and buffed. This section was scanned electronically and the new paint was mixed to this computer match of the original. |
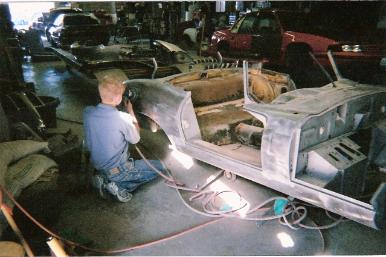
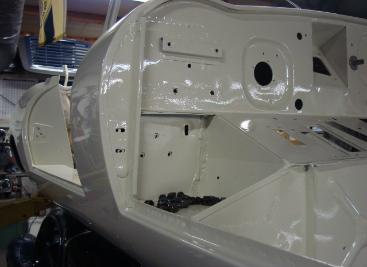
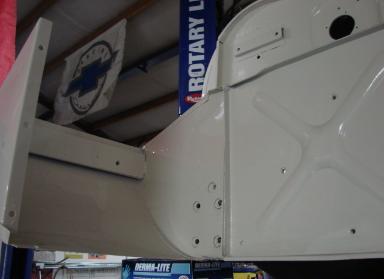
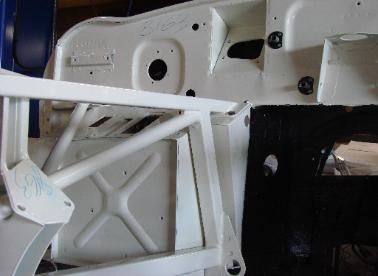
| Stripped the car was just as good as I expected, showing no signs of previous repair or abuse |
| The Jaguar factory leaded most all of the panel joints on the chassis tub. Some of this leading was replaced. |
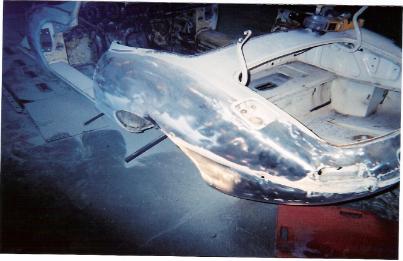
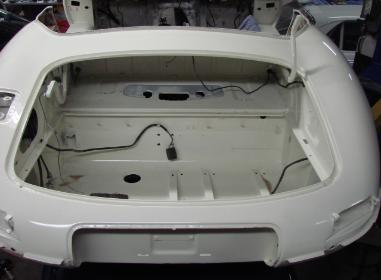
| The bare metal chassis sealed in special epoxy primer before the bodywork began. |
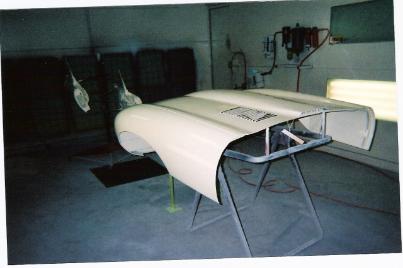
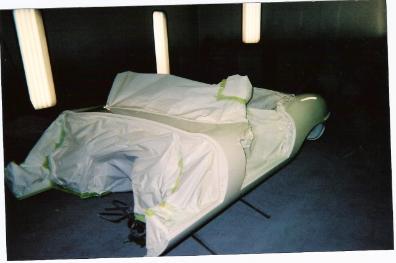
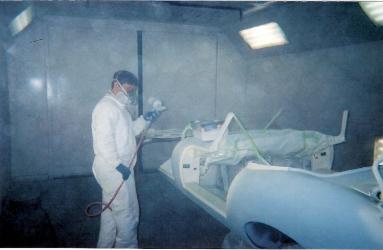
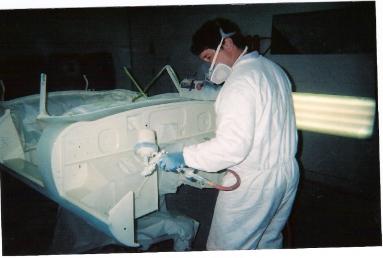
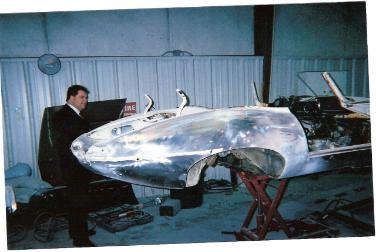
| Ready to paint body was allowed to sit and cure/shrink for 6 months prior to final blocking and paint. Pictures here are of the final coat being applied and then "cooking" under the lights. |


| Some shots of a few "nooks and crannies" post paint. The front cage bolts laying on the shelf have been re-electroplated. |
| The factory spot welds and seams I tried to show in this shot would be near impossible to replicate if restoring a previously wrecked or rusted XKE |
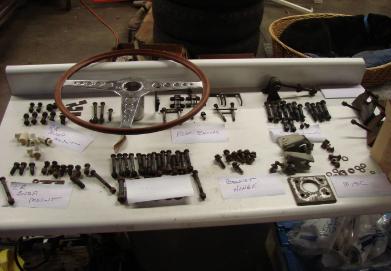
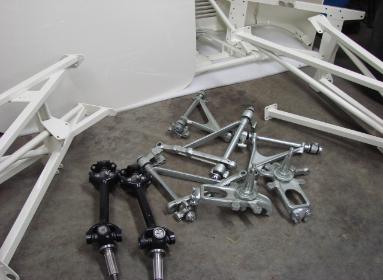
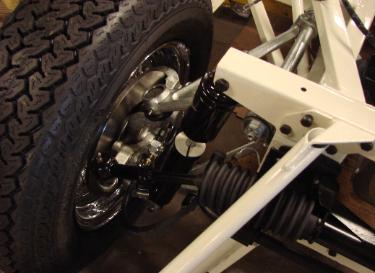
| Just a few of the many suspension parts all being restored. Complete disassembly of the parts is necessary to do it right. All of the old bushings, bearings and seals were removed. Most of these parts have been hot tank cleaned and bead blasted by yours truly. Then acid dipped and electroplated. For most all the parts that will be exposed to moisture, like these, the final step has been to bake a clear powder coat over the plating. This will hopefully keep them bright for a long time. The black powder coat on the halfshafts looks like paint but is much, much more durable. The only places I am using paint, rather than powder is the engine block and transmission as they do not need to be disassembled. Jeff painted them with quality 2 stage hardened paint. We have taken a no Krylon pledge. |

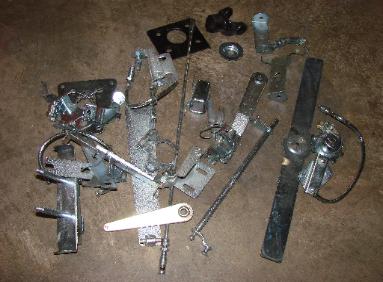
| One of the most difficult jobs so far has been keeping track of everything as it goes out for plating, powder and paint |
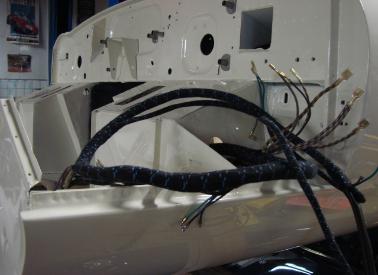
| Rhode Island Wiring Service did a nice job of re-knitting the wiring harness cover which had faded. Pattern and materials match the original exactly. I can highly recommend them. |
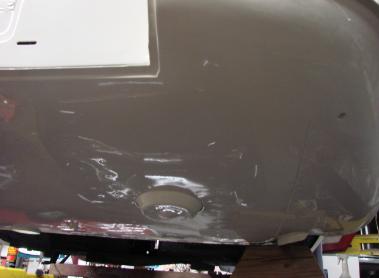
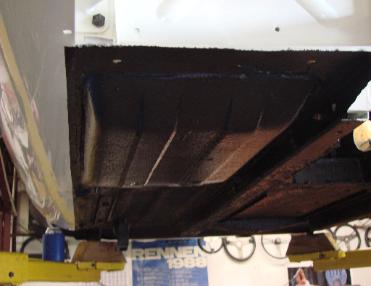
| The original factory applied flint coat was in excellent condition and required no touch up. So it was steam cleaned and the bottom of the car simply painted black. |
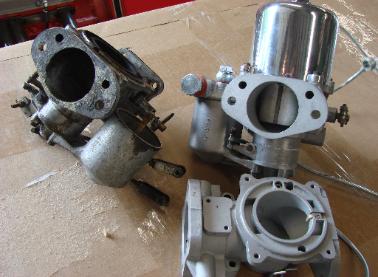
| I ordered and returned 2 water pumps from "concour" vendors because both had castings a little different than the original casting now freshly rebuilt and pictured. |
| Not sure why there were dabs of white paint on around dip stick and then over the serial number? Seems to have clearly been done very early on and presumably at the factory so we replicated them exactly on the repainted block. |
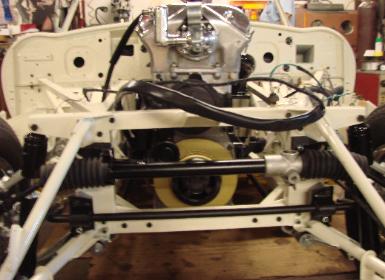
| A new 3.07 ratio ring and pinion was installed which will allow the car to cruise at higher speeds and lower rpms. I hated to do this. But the alternative, a 5 speed conversion, would have been visibly non-original and I do plan to drive the car. |
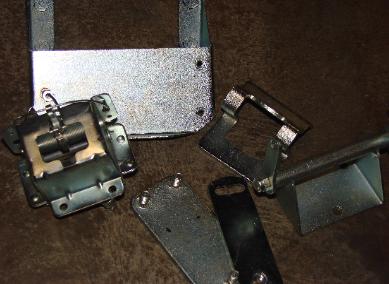
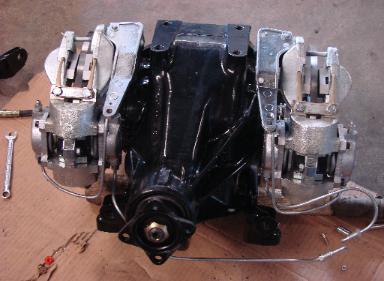
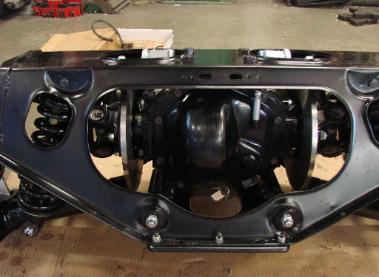
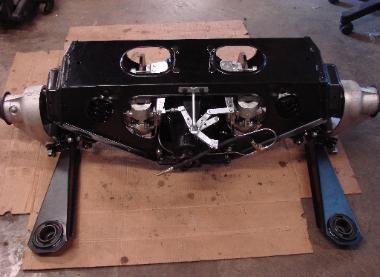
| All of the caliper and master cylinders were sent to Apple Hydraulic for rebuild including stainless steel sleeving of the bores. Seen here during trial assembly of the diff with all parts replated, powder coated, or cleaned. |
| The first major subassembly restored and ready to bolt up to the chassis. This stuff will be nearly impossible to see on the completed car, and even more difficult to work on. For this reason many original parts that could have been reused like brake pads, rotors, u-joints, ect. were replaced. Every part pictured is either freshly replated or powder coated. |
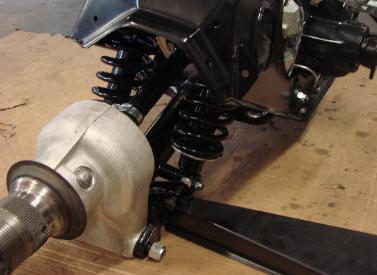
| Shocks are the new Black Koni classic type. Note the restored original hose clamp. For the car as a whole only one clamp was ruined in disassembly. I'm shopping to replace that one. |
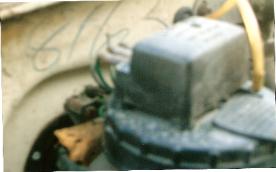
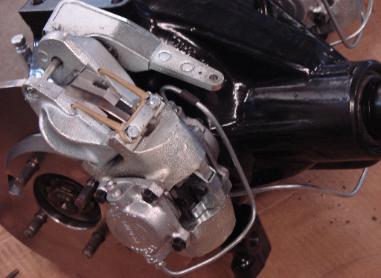
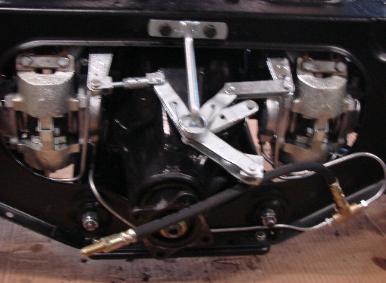
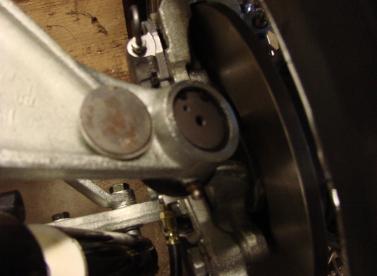
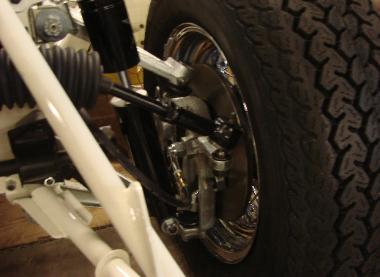
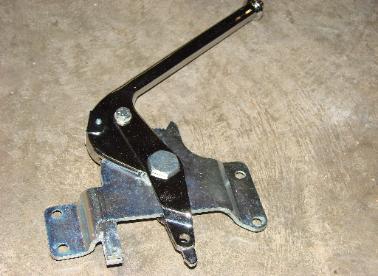
| Hopefully the engineer who designed this crazy and unnecessarily complicated emergency brake bell crank system was never allowed to design anything again. |
| Before, during, and after |
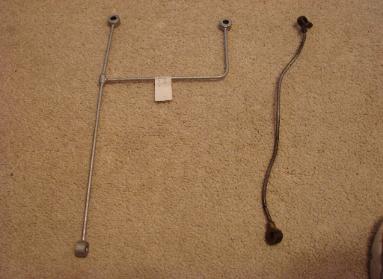
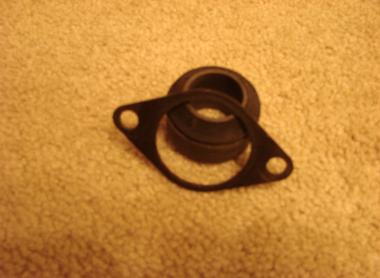
| On left is the "sold as correct" replacement rear cam line sold by all the vendors I checked with. It fits but is not the same as the broken original on the right with offline coming out of banjo. Correct one has been found used and will be back from the plater soon. |
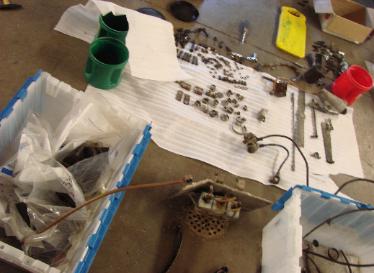
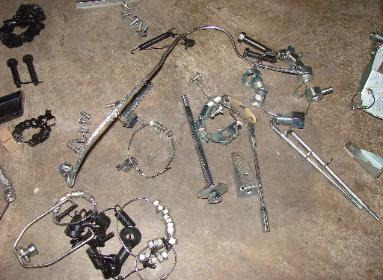
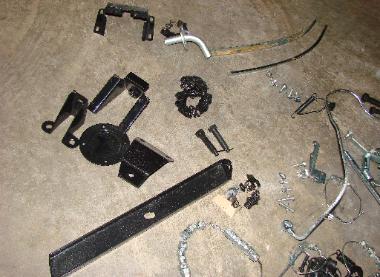
| More tiny little parts to inventory and restore |
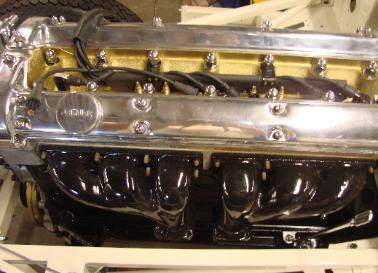
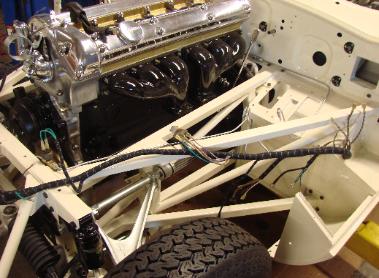
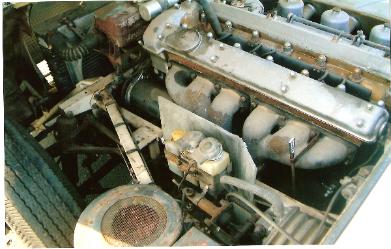
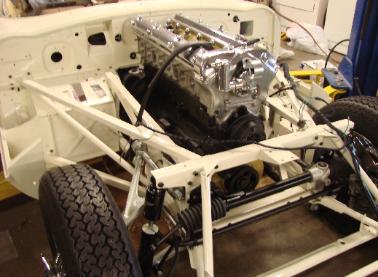
| Long block was installed prior to front frame and suspension but I didn't get a pic. Starting to look more finished than it really is now. |
| I had everything originally polished by Jaguar repolished, but nothing more. |
| New porcelain coating for the exhaust manifolds was done by XKs Unlimited and looks great. (and original) |
| Do not buy one of these repro transmission mounts sold by at least two of the larger US vendors. The repro is made of two parts sweated or pressed together. And it can fail by coming easily apart as this one did. Luckily the original on piece mount on my low mile car is still in excellent condition and can still be reused. |
| Installed and to the right is the after market top cap supplied in the ball joint rebuild kit. Note it has holes for a grease nipple. At left is the original cap that will be installed after restoration. Vendors will actually send you the later (and superior) sealed 4.2 units when you order the 3.8 kits unless you insist on the original type. |
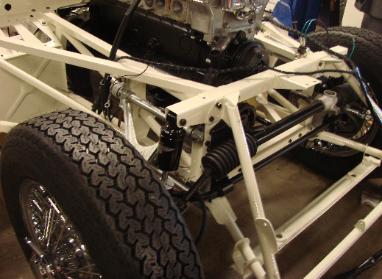
| Most of the restored front suspension is now together and the car rolls now! |
January 12, 2009 update below After making easy to see progress for so long things seem to be going so slow. The reality though is just that some of the big things were finished and the meticulous restoration of all the little stuff has begun. We have been disassembling and cleaning and powder coating and painting and plating just as much as in the past. |

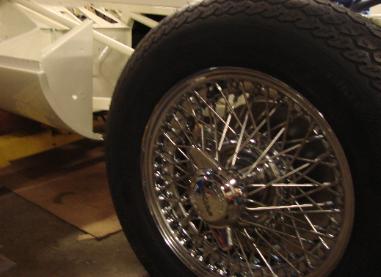
| Purchased four new Dayton wheels and fitted them with Vredestein classic radials. Spare has been on the ground, but is near new original, delivered with the car in 1964, tire so will keep it in the trunk. Have not decided yet if I should clean the original protective coating off the spare wheel or leave it on. |
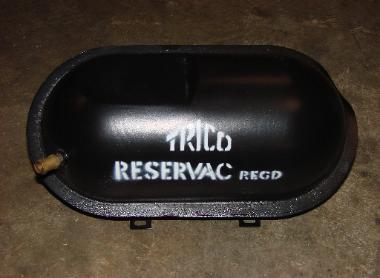
| This is the restored brake vacuum reservoir after I cleaned it, stripped it, and had black powder coat baked on. Then Jeff, using a stencil he made from the part when it was first removed from the car, repainted the "Trico Reservac REGD", even being careful to match the original light overspray. |
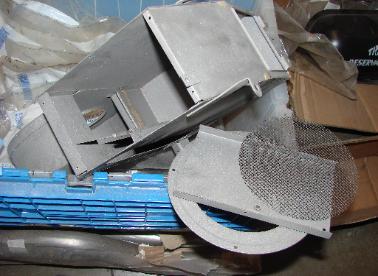
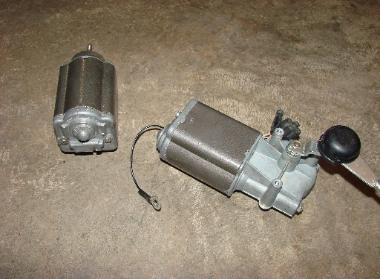
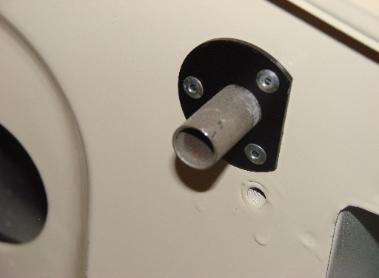
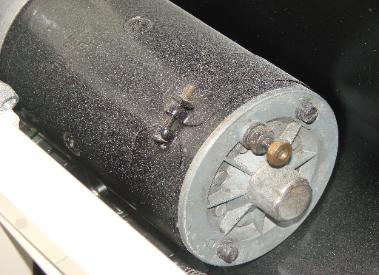
| The starter, cooling fan, and windshield wiper motors have been completely disassembled and cleaned, the housings repainted, levers, arms and hardware re-plated. Brushes and all looked new, probably because they almost are. (camera flash picks up the dust on the starter motor and makes it look speckled in the photo. It is the correct smooth black finish) |
| Some of these parts like the heater box shown bare here need cleaning in impossible to reach places. For this Shelby and I built and set up an electrolysis system using instructions found on the internet. The process worked well loosening and converting light surface rust in tight places. The job finally finished with the same acids and washes we bought from Eastwood for the fuel tank. |
| Brackets ready and waiting for master cylinders, boosters, and related assemblies. All of hydraulic cylinders including the calipers were sent to Apple hydraulics for rebuild. Even though the cylinder bores were okay, all were sleeved with stainless steel. I just don't want leaking brake fluid to ever threaten a car this nice. |
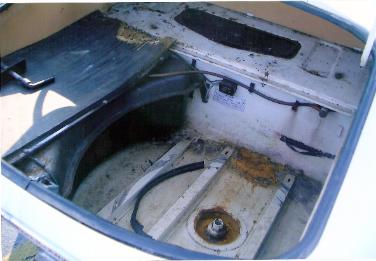
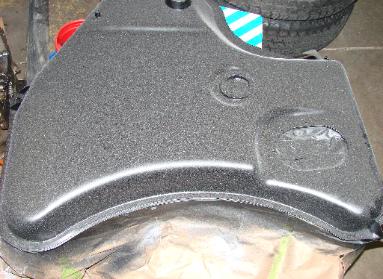
| The fuel tank ready for final painting. No leaks when found, but several gallons of 38 year old gas had trapped water against the bottom of the tank and corrosion could be seen. The xke tank is very difficult to clean because there are baffles blocking access to more than 70% of the inside surface. I cleaned the inside of the tank using Electrolysis, tumbling abrasives, and repeated acid washes. I then coated the entire inside of the tank with Teflon. Jeff will be painting it as the teflon coating would never survive the high powdercoat baking temperatures. |
| The heater core pipes are so hard to remove and install that we installed new, just to insure we would never have to take them out of the restored car. |
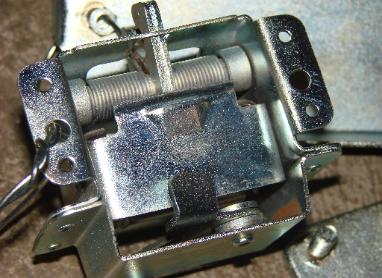
| Some of the restored latch assemblies. Again, lots of work being done but progress seems slow with all of these small assemblies |
| Most all of the "silver" metal parts on this jag are either zinc or cadmium plated. The black parts like bolts seen here were black oxide and I am having them professionally black zinc oxide plated. The majority of the parts like the exhaust brackets shown, that were originally painted, have now been professionally powdercoated. Of course the emergency brake handle is chrome. |
| XKE page 1 click here for XKE page 2 |
| See Page 2 update |